
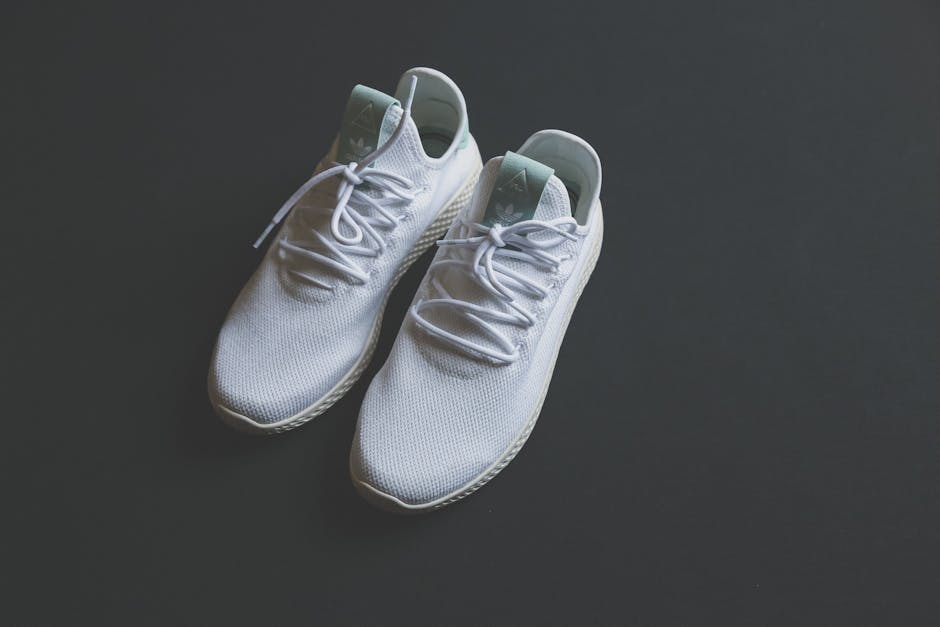
Discovering mould on trainers can be alarming and pose health risks if not addressed swiftly. Primarily caused by moisture and lack of proper ventilation, mould not only damages the aesthetic appeal but can also lead to the deterioration of your favourite trainers. Immediate action can save your shoes and protect your health.
Quick Guide to Tackling Mould on Trainers:
– Identify the Mould: Look for discolored patches or a musty smell.
– Understand the Cause: High humidity and improper storage are the main culprits.
– Take Action: Use mild detergents or specialized cleaners depending on the material.
– Prevent Future Growth: Ensure trainers are dry before storage and use silica gel packets for moisture control.
Mould thrives in damp environments and can cause various health issues, especially for those with allergies or respiratory problems. Addressing the issue promptly can prevent further damage to the trainers and safeguard against potential health risks. We will cover everything from identifying mould to effective removal methods and tips for preventing future growth.

Keep your trainers in top-notch condition by understanding the causes of mould growth, recognizing the health implications, and implementing effective preventative measures.
Identifying Mould on Your Trainers
Identifying mould on your trainers is the first step towards tackling the problem. Let’s break it down into simple bits: colors, textures, and odors.
Colors
Mould can show up in a variety of colors, making it somewhat tricky to spot at first glance. You might see:
- Green: Often looks fuzzy, like tiny plants growing on your shoes.
- Black: Can appear as spots or streaks, usually a sign of a more severe mould issue.
- White: This mould can look powdery, almost like your shoes got dusted with flour.
Textures
The texture of mould can give you a good clue about what you’re dealing with:
- Fuzzy: This is common for mould growing in a moist environment. It might feel soft to the touch.
- Slimy: If the mould is still wet, it can feel slick or slimy.
Odors
One of the most noticeable signs of mould is its smell.
- Musty Smell: If your trainers have a stale or earthy scent, that’s a big red flag for mould presence.
Now that you know what to look for, you can take the next steps to clean up and protect your trainers from mould. Catching mould early can save your shoes and keep them in wearable condition for longer.
Next, we’ll dive into the most effective methods for removing mould from your trainers, ensuring they stay fresh and clean.
Causes of Mould on Trainers
Mould on trainers isn’t just unsightly; it can also cause damage to your shoes and potentially affect your health. Understanding the causes of mould is the first step in preventing it from taking over your footwear. Let’s break it down into simple terms: humidity, condensation, and improper storage.
-
Humidity: This is like the air holding onto water. When the air is full of water, it makes everything feel damp. If you live in a place where the air often feels wet or you keep your trainers in a room like this, you’re giving mould a perfect place to grow.
-
Condensation: Ever noticed water droplets on the inside of a window? That’s condensation. It happens when warm, moist air hits a cooler surface and turns back into water. This can happen inside your trainers too, especially if they get warm and sweaty from your feet, then cool down quickly in a colder environment.
-
Improper Storage: Throwing your trainers in a dark, damp closet or putting them away while they’re still wet is like rolling out the red carpet for mould. Mould loves dark, wet places where it can grow undisturbed.
Real-Life Impacts
Imagine you’ve been caught in the rain and your trainers are soaked through. You get home, take them off, and put them straight into the closet without drying them. A few days later, you reach for your trainers and find them covered in mould. This scenario is more common than you might think and highlights the importance of proper shoe care.
Quick Tips for Prevention
-
Let Them Breathe: After wearing your trainers, especially if they’re damp, let them air out in a well-ventilated area before storing them.
-
Avoid the Trap: Never store your trainers in plastic bags. Plastic traps moisture, creating a breeding ground for mould.
-
Stay Dry: If your trainers get wet, dry them out as soon as possible. You can use newspaper or a towel to help absorb the moisture.
By understanding these causes, you can take proactive steps to keep your trainers mould-free. Prevention is key. Keeping your trainers dry, well-ventilated, and properly stored will go a long way in avoiding mould growth.
In the next section, we’ll explore the most effective methods for removing mould from your trainers, ensuring they stay in top condition.
Effective Mould Removal Methods
When it comes to getting rid of mould on trainers, the right approach can save your favorite pair. Let’s dive into some tried and true methods.
Vinegar and Water Solution
A simple mix of white vinegar and water can work wonders. Here’s how:
- Mix equal parts of white vinegar and water in a spray bottle or a bowl.
- Apply the solution to the mouldy areas of your trainers using a soft cloth.
- Wipe gently to remove the mould. The acidity of the vinegar helps kill the mould spores.
- Dry your trainers in a well-ventilated area but keep them out of direct sunshine to prevent damage to the material.
Rubbing Alcohol and Water
For tougher mould, rubbing alcohol might be your best bet:
- Prepare a solution with one part rubbing alcohol and one part water.
- Dab a cloth in the solution and gently apply it to the affected areas.
- Let it dry completely in a shaded, airy spot.
Rubbing alcohol is great for disinfecting and can be less harsh on certain materials than vinegar.
Special Care for Different Materials
- Leather: Use a gentle approach. After cleaning, apply some saddle soap to condition the leather and keep it soft.
- Suede: This material can be tricky. It’s best to use a special suede brush to remove mould. Avoid water-based solutions as they can damage suede.
- Canvas: Both vinegar and rubbing alcohol solutions work well. Be sure to rinse with a damp cloth and let dry thoroughly.
Professional Solutions
Sometimes, DIY methods might not cut it, especially for severe mould or delicate materials. That’s where NuShoe Inspect & Correct comes in. They specialize in professional shoe repair and mould removal, ensuring your trainers are not only mould-free but also well-cared for.
By following these methods, you can effectively remove mould from your trainers, regardless of their material. The key is to act quickly and dry your trainers thoroughly after cleaning. If you’re unsure about treating a particular material, don’t hesitate to seek professional help from services like NuShoe Inspect & Correct.
In the next section, we’ll cover how to prevent future mould growth, keeping your trainers in perfect condition for years to come.
Preventing Future Mould Growth
After tackling the daunting task of removing mould from your trainers, the next step is ensuring it doesn’t make an unwelcome return. The secret to mould-free trainers lies in prevention. Let’s dive into how you can keep those pesky spores at bay.
Silica Gel Packets
Believe it or not, those little packets that come with new shoes and electronics are gold for preventing mould. Silica gel packets absorb moisture, making your shoe storage area less inviting for mould. Tuck a few packets in each shoe when not in use and scatter some around your shoe storage area. It’s a simple, yet effective strategy.
Proper Drying
Before you store your trainers away, make sure they’re completely dry. This might mean letting them air out overnight after a day’s wear or ensuring they’re bone dry after a cleaning session. Moisture is mould’s best friend, so keeping your trainers dry is crucial.
Ventilation
Good air circulation is key to preventing mould. If possible, store your trainers in a well-ventilated area. This could mean keeping your shoe rack near an open window or in a part of your home where air flows freely. Stagnant air promotes mould growth, so let’s keep things moving.
Dehumidifiers
For those living in humid climates, a dehumidifier can be a game-changer. By reducing the humidity levels in your home, you’re creating an environment that’s less hospitable for mould. Place a dehumidifier in your shoe storage area or in rooms where you keep your trainers. It’s an investment that can save you from mould troubles down the line.
Remember, prevention is always better than cure. By incorporating these strategies, you’re not just protecting your trainers from mould, but also ensuring they stay in top-notch condition.
In the next section, we’ll answer some Frequently Asked Questions about Mould on Trainers. Whether you’re curious if mould can be washed out of shoes, why your shoes are going mouldy in your wardrobe, or if you can wash mouldy shoes in the washing machine, we’ve got you covered. Stay tuned for practical advice and tips.
Frequently Asked Questions about Mould on Trainers
Mould on trainers can be a real headache, causing not only a musty smell but also potential health risks. Let’s dive into some of the most common questions people have about dealing with mould on their shoes.
Can mould be washed out of shoes?
Yes, mould can be washed out of shoes, but the method depends on the material of the trainers. For canvas shoes, a mixture of vinegar and water can be effective. Simply mix equal parts of white vinegar and water, apply it to the mouldy areas with a soft brush, and then rinse with water. For leather or suede shoes, it’s a bit trickier due to the delicate nature of these materials. A professional cleaner, like NuShoe Inspect & Correct, may be the safest option to avoid damage.
Why are my shoes going mouldy in my wardrobe?
The main reason shoes go mouldy in a wardrobe is humidity and lack of ventilation. If your wardrobe is in a damp area or poorly ventilated, moisture can get trapped inside, creating an ideal environment for mould. To prevent this, try using silica gel packets to absorb excess moisture, ensure your shoes are completely dry before storing them, and consider using a dehumidifier in particularly damp areas.
Can I wash mouldy shoes in the washing machine?
Washing mouldy shoes in the washing machine can work for certain types of shoes, like those made of canvas. However, it’s important to pre-treat the mould with a vinegar and water solution first. Remove the insoles and laces, and wash them separately. Use a gentle cycle with cold water and let the shoes air dry afterwards. Do not use the washing machine for leather or suede shoes, as the water and agitation can cause damage.
The key to dealing with mould on trainers is to act quickly and choose the right method based on the shoe material. Regular cleaning and proper storage are essential to prevent mould from returning. If you’re unsure about the best approach, consulting with a professional like NuShoe Inspect & Correct can save your shoes and keep them in wearable condition for longer.
Conclusion
After diving deep into mould on trainers, it’s clear that prevention and maintenance are our best allies. Regular cleaning and moisture control are not just recommendations; they are essential practices to keep our beloved footwear in top condition and our health uncompromised.
Regular Cleaning: A Must-Do
Let’s not wait for mould to announce its unwelcome presence. Incorporate a cleaning routine for your trainers. After each wear, take a moment to wipe them down, removing dirt and sweat that could invite mould. This simple habit can significantly extend the life and appearance of your trainers.
Moisture Control: Keep It Dry
Moisture is mould’s best friend. To keep them apart, make sure your shoes are completely dry before storing them. Use silica gel packets in your shoe storage areas to absorb any lurking moisture. A dry shoe is a mould-free shoe.
NuShoe Inspect & Correct: Your Professional Ally
Sometimes, despite our best efforts, mould finds a way. When it does, it’s time to call in the professionals. NuShoe Inspect & Correct specializes in giving your trainers a new lease on life. Their expert services ensure your shoes are not only mould-free but restored to their former glory. Trusting your shoes to NuShoe means ensuring they receive the best care possible, from thorough cleaning to antimicrobial treatments.
In conclusion, tackling mould on trainers is a manageable task with the right approach. Regular cleaning, diligent moisture control, and the expertise of NuShoe Inspect & Correct are your best defenses. Keep your shoes dry, clean regularly, and don’t hesitate to seek professional help when needed. Together, we can keep our trainers in prime condition, ready for whatever steps lie ahead.